Publishing your App to the app Platform is what allows customers to find and use what you have built. To get started make sure you have this information readily available:
Information about your technical stack.
Your app's privacy policy.
Technical and business contact information.
Add new app
From the Portal homepage, use the left-hand panel to navigate to App Dashboard. Next, click Add new app at the top right of the page.
The App dashboard is where you can add a new App, and you can see the status, details, and next steps of each App.
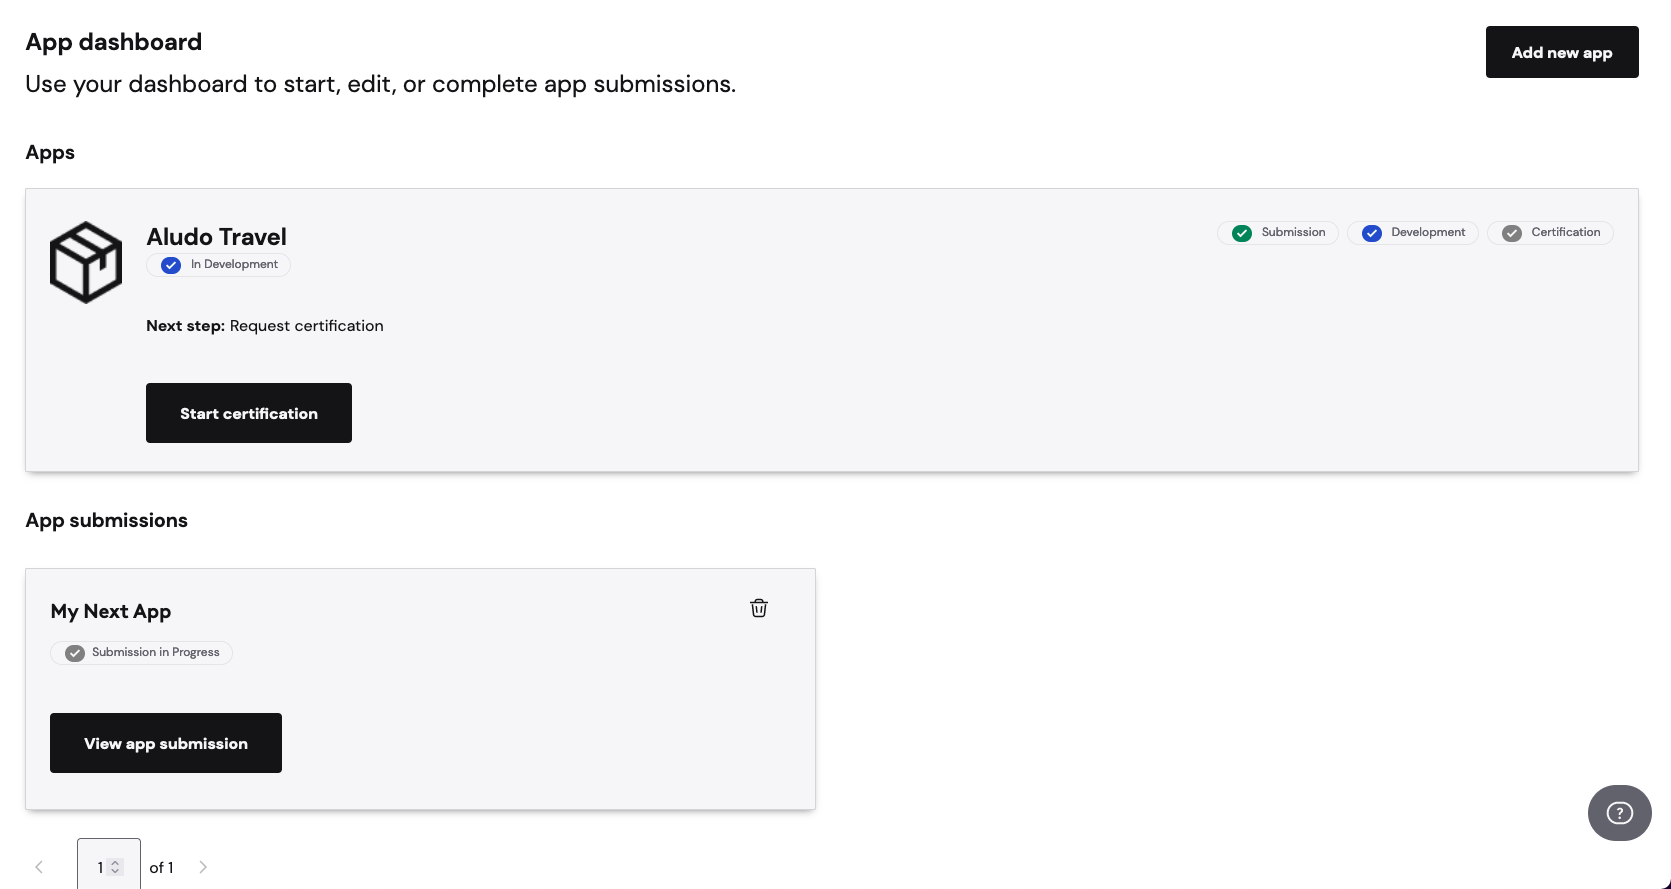
Save progress
Anytime throughout the publishing workflow, you can save your progress and return to it later in the App Management Dashboard.
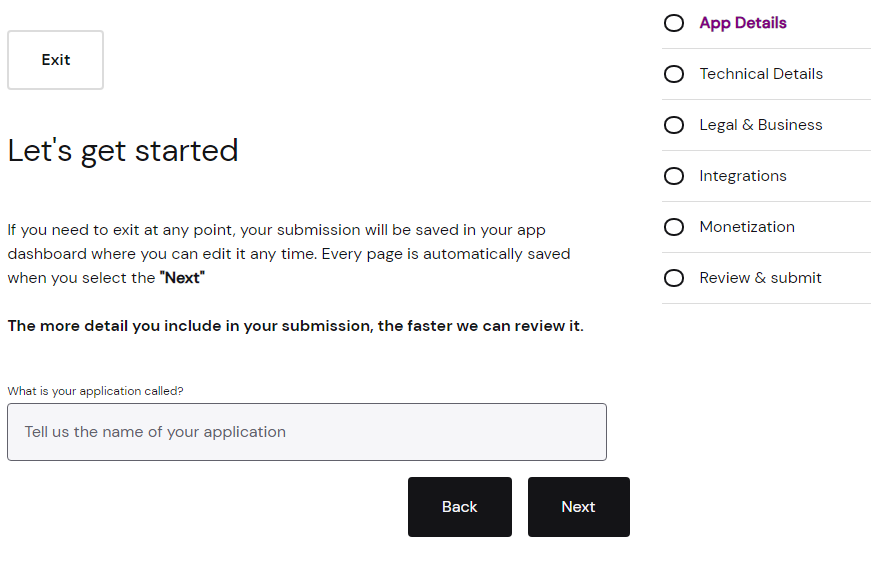
App details
First things first, you'll need to name your App. Your App's name can be anything, however, we recommend naming your App carefully. While your App's name can be changed it requires working with our partner management team to do so. When you've entered an App name you are satisfied with, select Next.
Basic information
Once you have named your App, you will need to include what your App's value proposition is in the "What can your App do" section. This is meant to provide the people reviewing your App with a brief overview of what it does. Example: "MyYogaApp curates instructional yoga videos for all skill levels".
Next, include the main content type of your App and select the primary category and secondary category of your App. When you have finished selecting and writing your App's details, select Next.

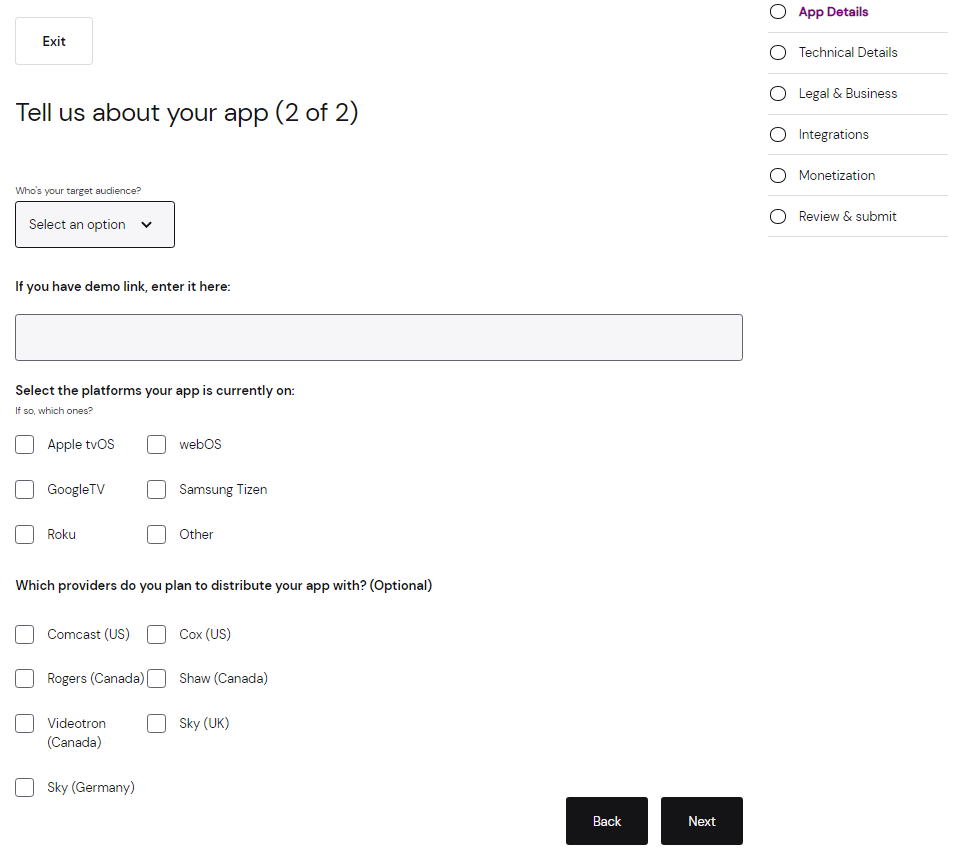
Demographics, platforms, & providers
Next, include your App's target audience, demo link, preferred providers, and existing platforms.
The audiences available are:
Rating | Description |
|---|---|
Young Kids | Content that is for children five or younger. |
Kids | Content for children 5 – 12. |
General Audiences | For all audiences. |
Parental Guidance | Content that's for kids five and over but requires parental oversite. |
Teens | Content for kids ages 13 – 19. |
Adults | Content for ages 19 and over. |
Provide a demo link if you have one. This is highly recommended as it allows our reviewers to see quickly and easily what your App is about. Then select the platforms your App is currently running on. This helps us better understand how we can improve the app Platform. Finally, you can select which providers you want to distribute your App with.
Technical stack
Next, provide information on how your App is built and how it runs.
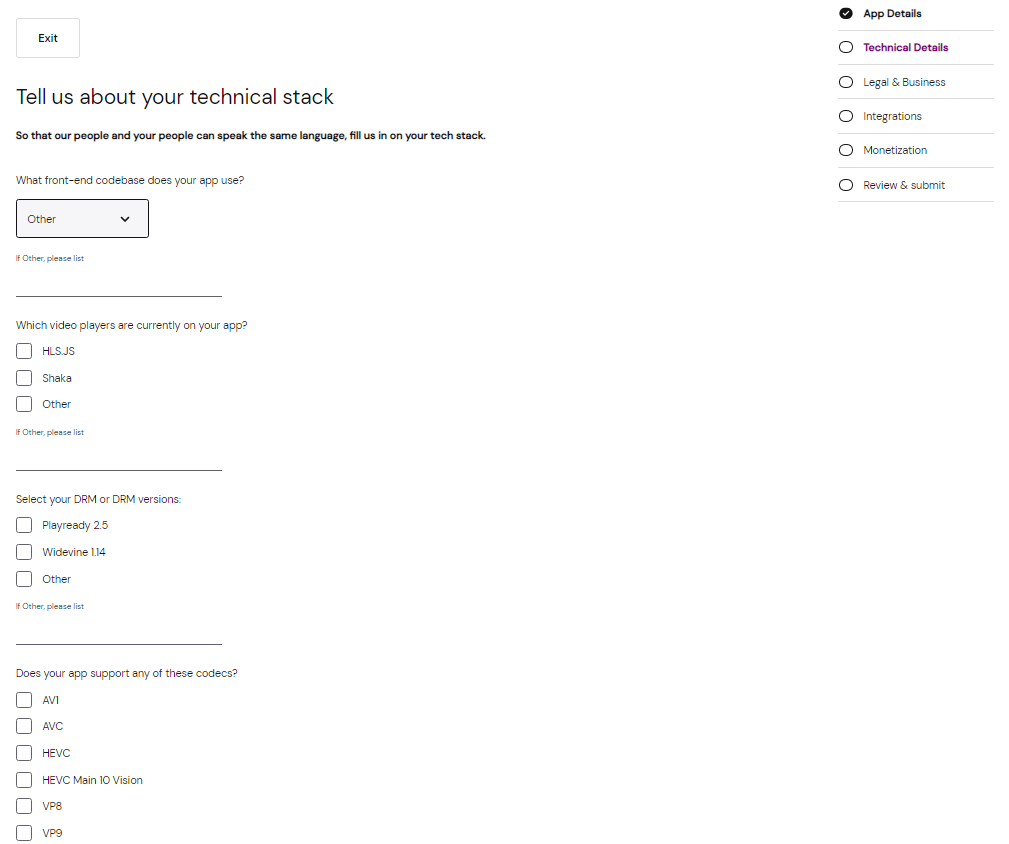
You'll want to ensure that your App meets the technical requirements to be reviewed for the app Platform. You can read more about those in the Player Requirements.
Be sure to include the front-end codebase your App uses. If this is not available in the dropdown, select "other" and write–in the front-end codebase you plan to use on the line below the dropdown.
You will also need to tell us the video player, the DRM, codecs, containers, video standards, audio profiles, if your App supports UHD and 4K, and if it supports a 1080p UI.
When you've finished the technical stack information, select Next.
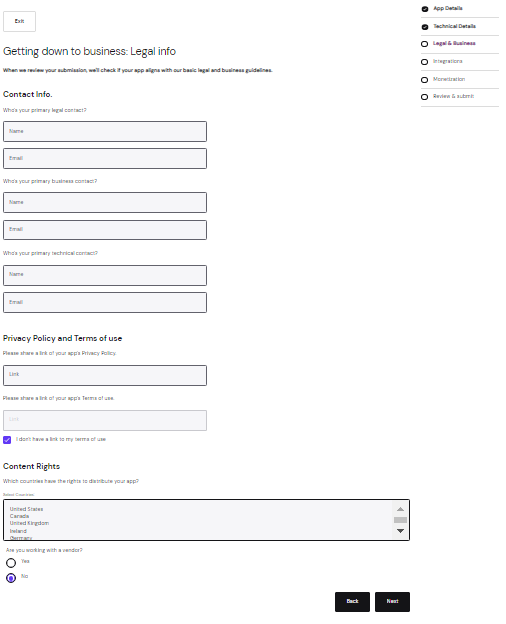
Legal
The primary legal contact is the person who would be your legal counsel for your App. The business contact can be anyone who can answer questions and make decisions about how your App should be published.
Integrations
Within the integrations segment, you will want to select any integrations that you may want to utilize within your App. This information will be used to help your partner manager best accommodate your needs.
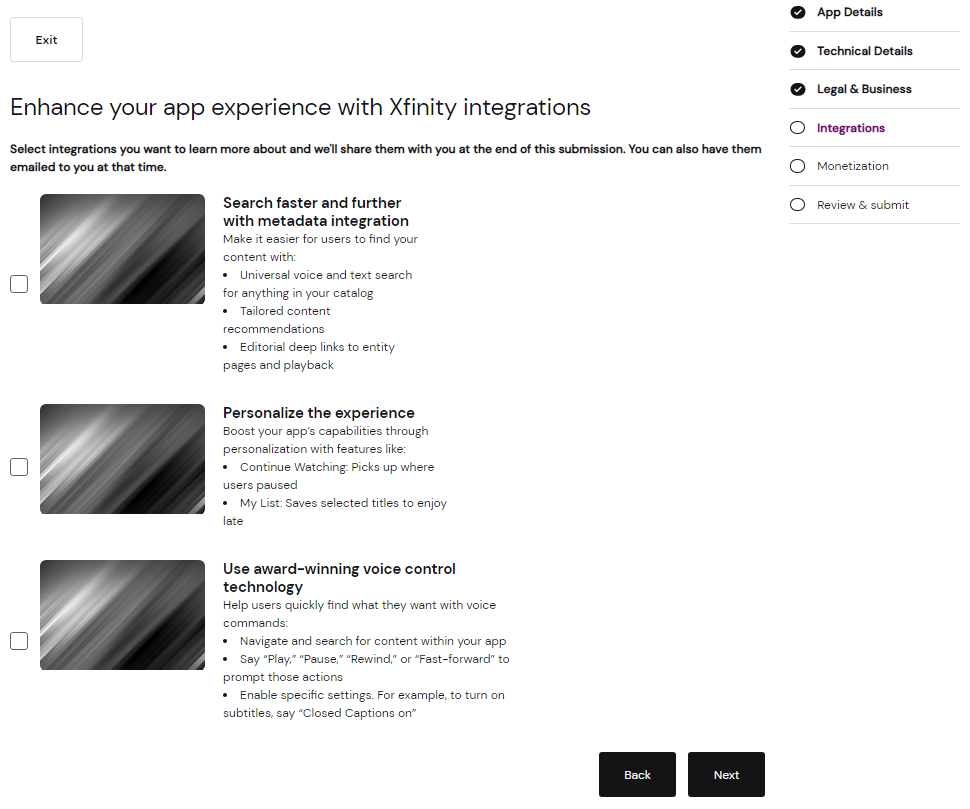
When you've finished the integrations information, select Next.
Monetization
The monetization step helps determine which paths of advertising and commerce you plan on including within your App.
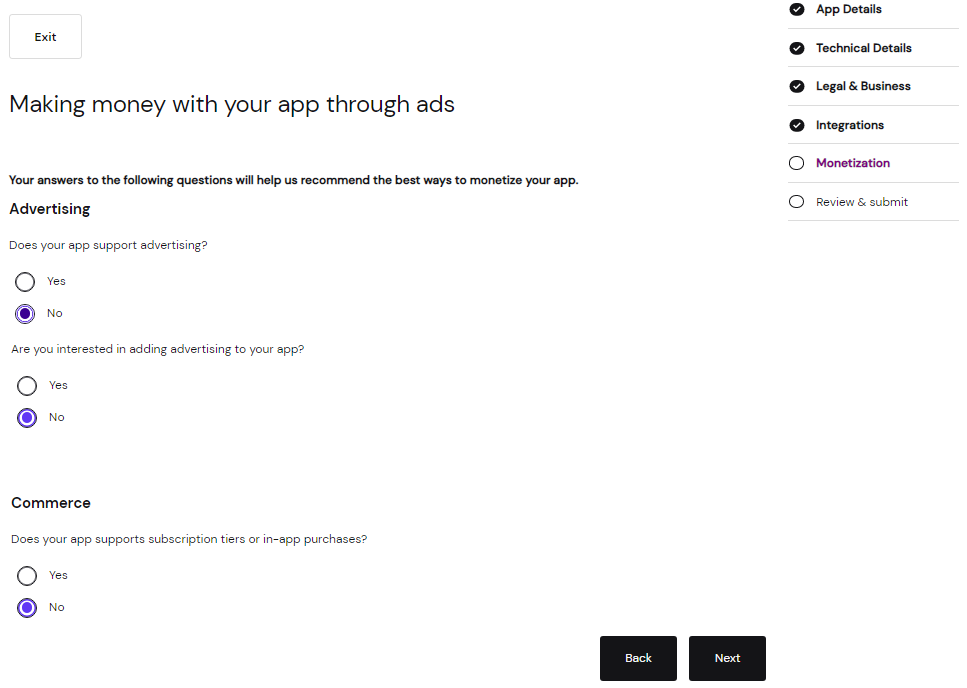
When you have finished the monetization information, select Next.
Review & submit
When you have finished entering all the required information, you will be presented with a screen that summarizes the information you have submitted. Review the details to ensure accuracy and go back to a prior step to make edits.
When you have finished reviewing and verifying all the information is correct, select Submit.